In Acumatica, you can use attributes to capture more data about their products when the system’s out-of-the-box functionality does not capture the desired data. Once captured, a user can sort and filter data in reports and generic inquiries based on attributes to segregate data and perform further analytics on a company’s products.
What is an attribute in Acumatica?
An attribute could be the color of an item, the quantity of components contained within that item, the year of creation for the item, the brand of an item, etc. There are many ways users can use attributes within Acumatica.
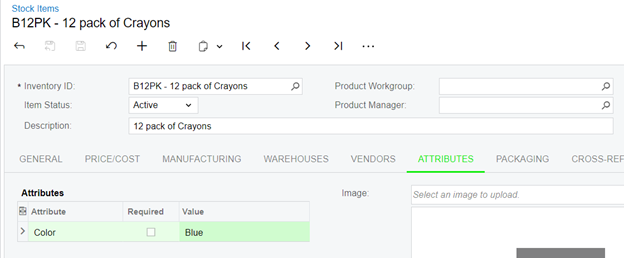
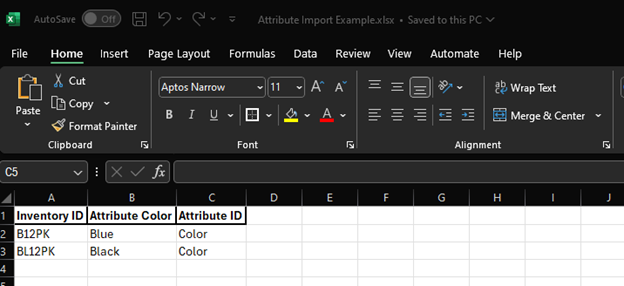
For example, let’s say one of our clients sells crayons. They sell boxes of different colored crayons that contain 12 per pack. The blue 12-pack has the item number B12PK and the black 12-pack has the item number BL12PK. However, when creating the item in Acumatica, the person who wrote the description did not specify the color. We know it is not a good idea to leave a description blank, but let’s just say this was what happened.
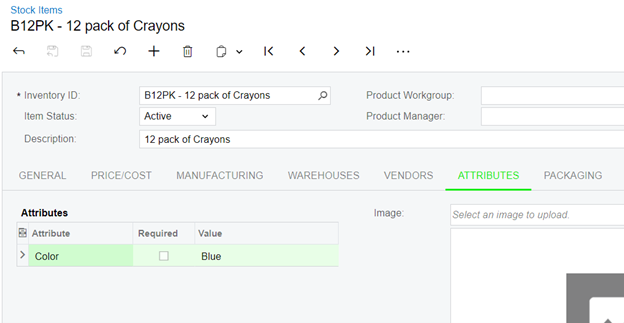
These are the items as they appear in Acumatica:
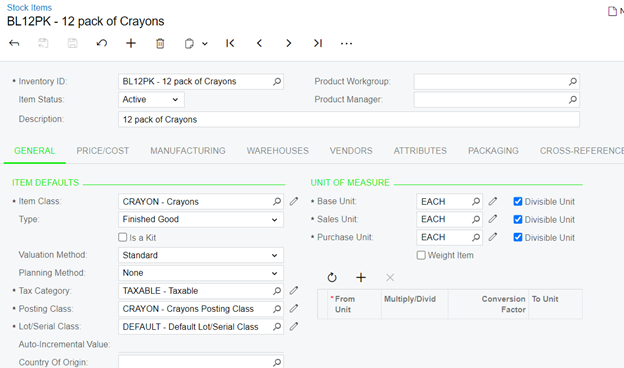
At a glance, you can’t tell which item blue and which item is black because of the lack of a semantic naming convention in the Item ID and the absence of color details in the description.
But, if you look at their respective attributes tab, you can see that someone has assigned them a color.
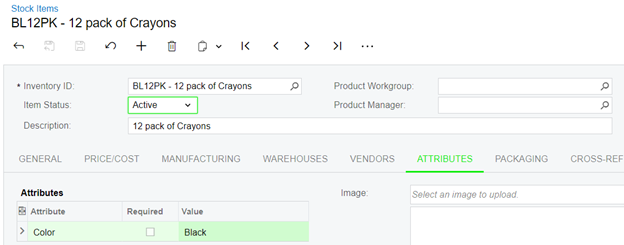
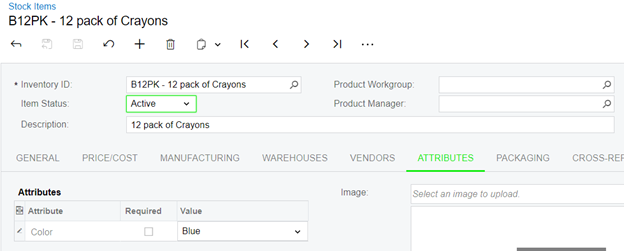
Having added the attribute values to the item upon creation would have negated any problems that could have occurred related to the neglected description. Again, this is more of an elementary example, but for more expensive items, you can see how this could become a big problem.
This is just one minor example of how attributes can be useful. Setting up an attribute on an item during its creation allows you to drill down into that item and determine its color.
When running reports, you can also filter the report to show calculations for the desired query and get information without having to manipulate your data in Excel.
Creation of an Attribute
To create an attribute, first navigate to the Attributes screen in Acumatica.
Once there:
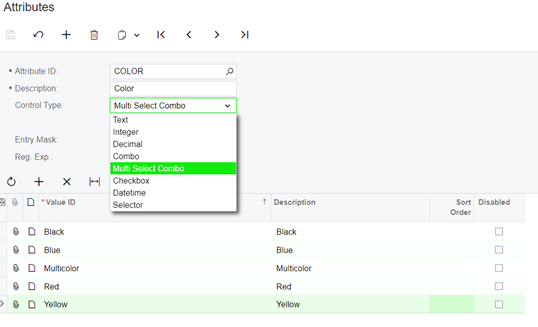
- Name your attribute.
- Give it a description.
- Determine what kind of control type you’d like to use – If you are unsure what control type you would like to use, click the Help button and navigate to the Form Reference for the Attributes page.
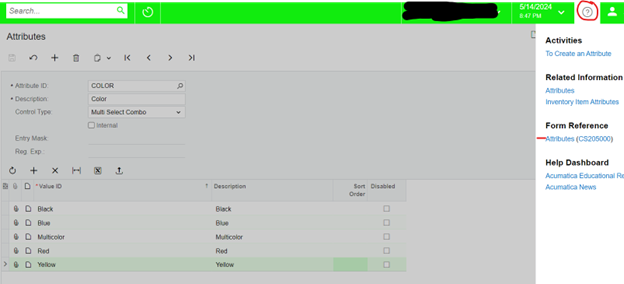

- If necessary, add your attribute values.
- Click Save.
For this example, we are using a Multi-Select Combo box and have added the values Black, Blue, and others.
Assigning an Attribute to an Item Class
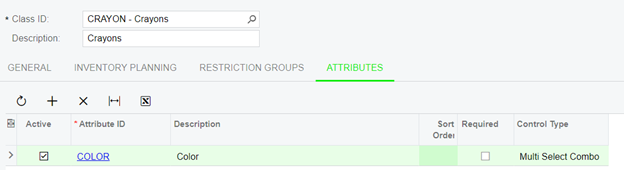
For the system to allow the addition of an attribute to an item, the Attribute ID must be specified on the Item Class for that item.
- Navigate to the Item Class screen.
- Select your Item Class ID in which you’d like to add the newly created attribute.
- Click on the Attributes tab.
- Once there, left-click in the blank field below the Attribute ID column in the grid and select your newly created Attribute ID. Here, our Attribute ID is COLOR.
- Save.
Importing an Attribute on an Item
Sometimes, you may need to assign an attribute value to an item that wasn’t originally given one. Knowing how to do this with an import scenario can save hours or even days, rather than having to assign them manually depending on your dataset.
Once you have your item created and have confirmed that you have done the above steps to assign the Attribute ID to the Item Class, you can then import your attribute value.
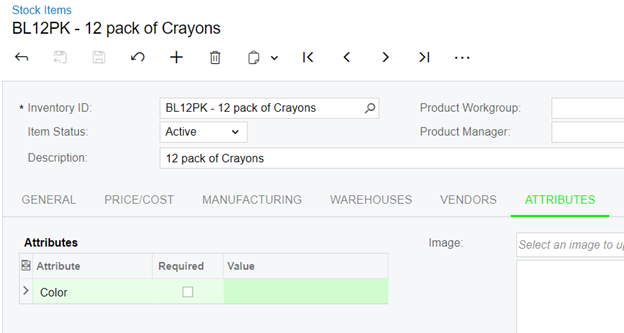
For this example, I will switch our two items to be blank so we can confirm that the system assigns the values.
To accomplish this, we can make a very simple Excel file.
Creating the Data Provider
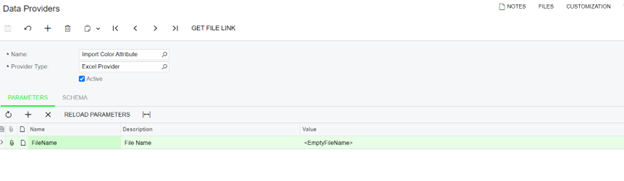
- Navigate to the Data Providers screen in Acumatica.
- Name your Data Provider. We named ours “Import Color Attribute.”
- Specify the provider type. Ours is an Excel Provider because we created an Excel file to accomplish the task.
- Click Save.
Your screen will look like this:
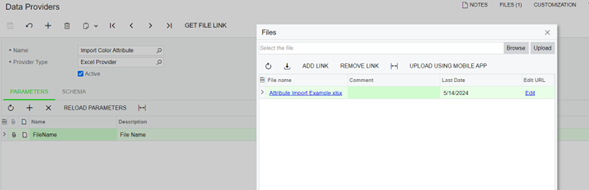
- Click “Files” at the top right of the screen.
- Click Browse on the window that pops up and select the file you just created.
- Click Upload on the pop-up window.
Your screen will look like this:
- Close the “Files” pop-up window.
- Click the “Schema” tab.
- In the “Source Objects” grid, click the checkbox under the “Active” column to make your Excel worksheet active.
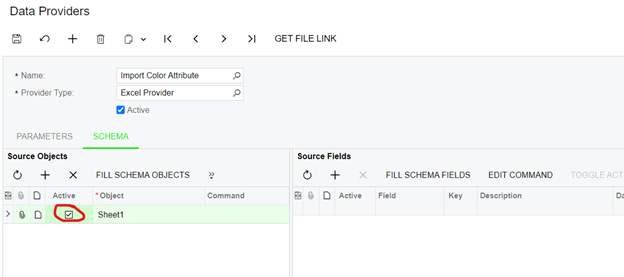
- In the “Source Objects” grid, click “Fill Schema Objects.”
- In the “Source Fields” grid, click “Fill Schema Fields.”
- Click Save.
Your screen will look like the image below:

Creating the Import Scenario
- Navigate to the Import Scenario screen.
- Click on the “+” to create a new Import Scenario.
- Create your Scenario name.
- Assign the screen name. For our example, we are adding an attribute value to a stock item, so we will select the Stock Items screen here.
- Select your data provider you just created. Ours is “Import Color Attribute.”
- Select the Provider Object. Ours is “Sheet1.”
- Assign Sync Type to be “Full.”
Your screen will look like the image below:

- I typically click “Save” now, so I have the scenario created and saved.
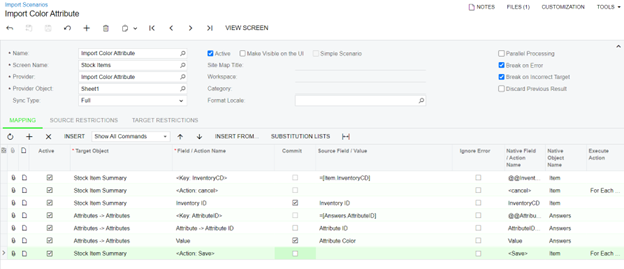
- Set up your scenario as shown below:
Note: the lines for fields `<Key: InventoryCD>`, `<Action: Cancel>`, and `<Key: AttributeID>` are system lines that are created automatically when you create the “Inventory ID” and “Attribute -> Attribute ID” fields. Do not create those lines manually.
- Save your scenario.
Importing your Scenario
- Navigate to the Import by Scenario screen.
- Use the magnifying glass next to the name field and select your import scenario you just created.
- Click “Prepare.”
Your screen will look like the image below:
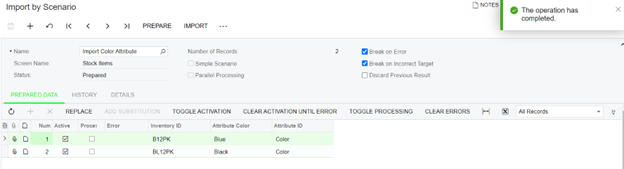
Note: If you get an error here, make sure that your Target Object for your attributes is “Attributes -> Attributes,” not “Attributes.” This is very confusing and has caused problems for many clients over the years.
When we go back to our items in Acumatica, we can see that they have successfully been assigned the correct attribute values based on the values we assigned in our Excel file.
Conclusion
Using attributes in Acumatica is a powerful way to enhance your data management and product tracking capabilities. By following the steps outlined above, you can easily enhance your data management and product tracking capabilities by creating, assigning, and importing attributes to capture and access all necessary product details. This not only improves the accuracy of your records but also streamlines reporting and analysis, enabling better business decisions. Whether you’re dealing with a simple product like crayons or more complex inventory, leveraging attributes can significantly optimize your operations and prevent potential issues related to data omission. Start implementing these practices today and see the difference in your Acumatica experience.
Need more help to get started with attributes in Acumatica? Contact us! Do you want more Acumatica tips and tips like this? Visit our blog archive.